New Kitchen Tools that Delight and Amaze

I’ve been married for fifteen years now (I was a mere child when wed), so this year several old kitchen standbys that I received as wedding gifts gave up the ghost. I told my husband we’d officially been married a long time because we’re outlasting our registry. Because I’m a serious Type A nerd, I can’t just go to the store and get a simple replacement off the shelf. No, I have to research these things. For days. That’s right, I researched Tupperware replacement for days.

Now most people get excited about the next iPhone or perhaps the advancements in HD technology. Me, I geek out in the advancements in kitchen equipment. People, there are awesome new things out there I did not know about. I thought maybe it was just me that would get excited about these wonders, but on recent visits, both my mom and sister were intrigued by my new acquisitions.

So, I thought I’d share some kitchen love. Here’s a few of my new favorites.

The Grapefruit Knife

grapefruit-knife-original

Yes, it’s a unitasker, and I usually am not a fan of those. However, it doesn’t take up much room, and it does its one task really, really well. It also makes grapefruit spoons unnecessary, and they take up more room than the knife.

GRAPEFRUIT-KNIFE-One side of the tool has a double blade that cuts down both sides of a segment at once. The curved knife side you use to cut around the rind. It cuts both the sides and the bottom of the segments away from the rind. Basically, once you’re done with the knife, your perfectly segmented pieces just plop into a bowl for eating and you can pitch all the stuff you don’t want into the trash.  Price:  Varies, usually between $4-7, depending on brand.  Can be found at Crate and Barrel or Amazon.

Joseph Joseph Colander

I had a pretty basic old colander that did the job that looked like this:

white colandar

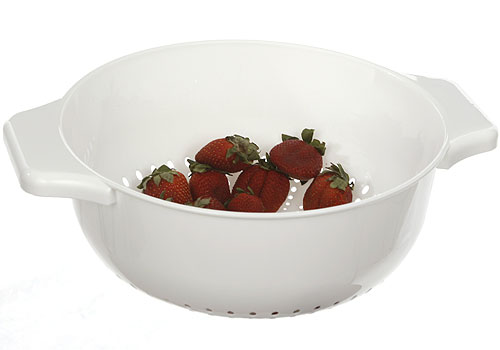
However, I was always trying to bend it to sort of make a funnel at one end so that it would pour its contents into bowls without slopping everywhere. All that bending is why it eventually cracked. It also had this annoying tendency to tip over at inopportune times. Really, though, when is it an opportune time for your colander to tip? This beauty solved my problem:

joseph colander

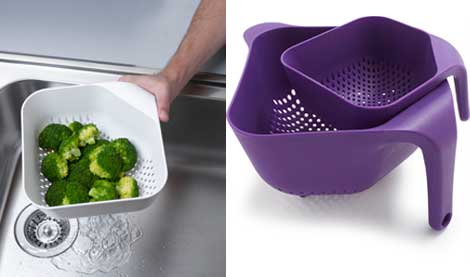
It sits firmly on little feet and pours exactly where I want it to. I happen to love that it comes in purple, too.  Price: Usually around $15 for the large size.  It’s in most home stores like Bed, Bath, & Beyond, and Amazon has a full complement of colors.

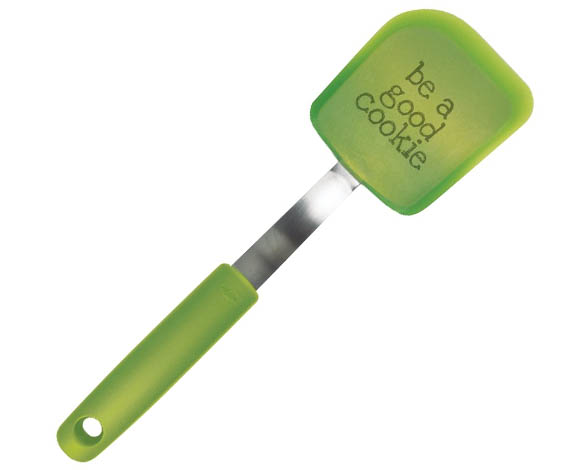
Silicone Splatter Shield

colourworks-silicone-splatter-screen-28cm-red-hang-tagged-da3739-9000062-0-1341824574000

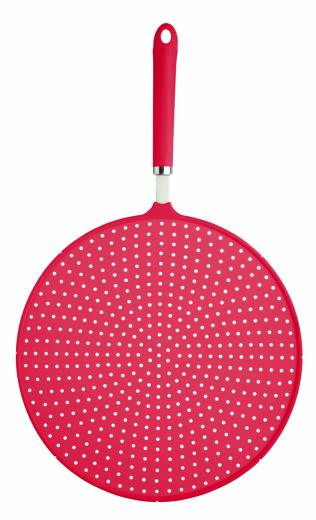
I have gone through a number of metal splatter shields. I don’t use them as splatter shields as much as for draining grease off of meat. They’re large and gangly, though, usually shoved into the same cupboard as my baking sheets and griddle where they die a slow death of many gouges until they rust out. When I went to look for a replacement this time, I found this silicone option. Oh, what a glorious day! All the little holes allow me to drain grease just fine, and the silicone handles the heat like a pro. Clean up is easier, I’m not ingesting any more rust, and it has held up to cupboard jostling a lot better, too. Now if only it came in purple.  Price: I’ve bought more than one of these now, some as gifts.  I’ve only been able to find them on Amazon, and the price fluctuates from $16-23.

Snapware Total Solution Pyrex Glass Spillproof Food Keeper Set

snapware

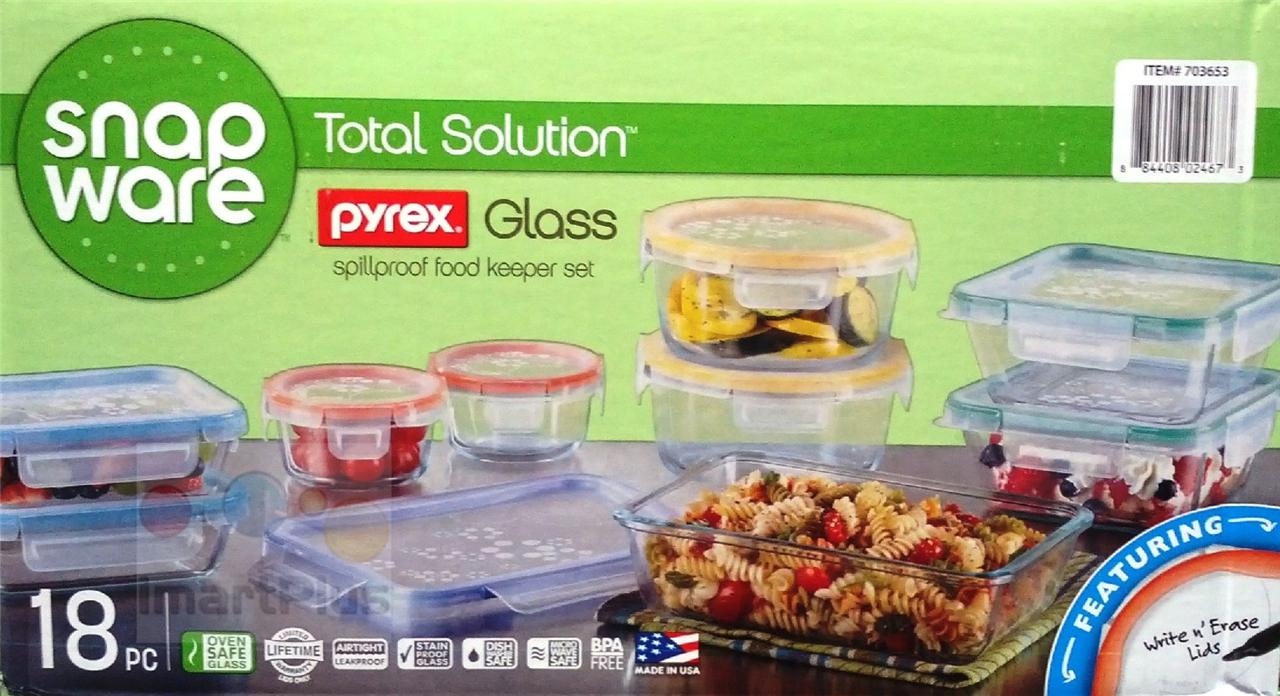
I’m a little embarrassed to tell you the total hours I spent researching food storage options before I settled on this one. But really, what is more frustrating that terrible Tupperware? Okay, a lot of things, I guess.

I wanted something BPA free that was microwave and dishwasher safe. I also didn’t want one round of spaghetti to turn them disgusting looking. I was leaning towards glass, but they absolutely had to be spillproof. Zero leaking, or I wasn’t interested. It would also be wonderful if they stacked with each other so they could take up less room in a cabinet. Oh, and something I didn’t know needed to be a criteria until I started reading reviews: if glass, it should be sturdy glass, not glass that occasionally released little shards into your food! Turns out wanting all of those things in a food storage container was asking a lot. Finally, I found these beautiful, beautiful babies. They met every criteria and even have lids that you can write what’s in the container and the date and then wipe it off/wash it off in the dishwasher.

Price: We found them cheapest at Costco ($29.99), who even has a coupon for them sometimes ($6 off). After a couple months with the first set, we bought another.  They are at most other home goods stores and online, but you can pay as much as $50 for the same set.

Honorable Mentions:

OXO Jar Spatula

1241581_Jar Spatula_white

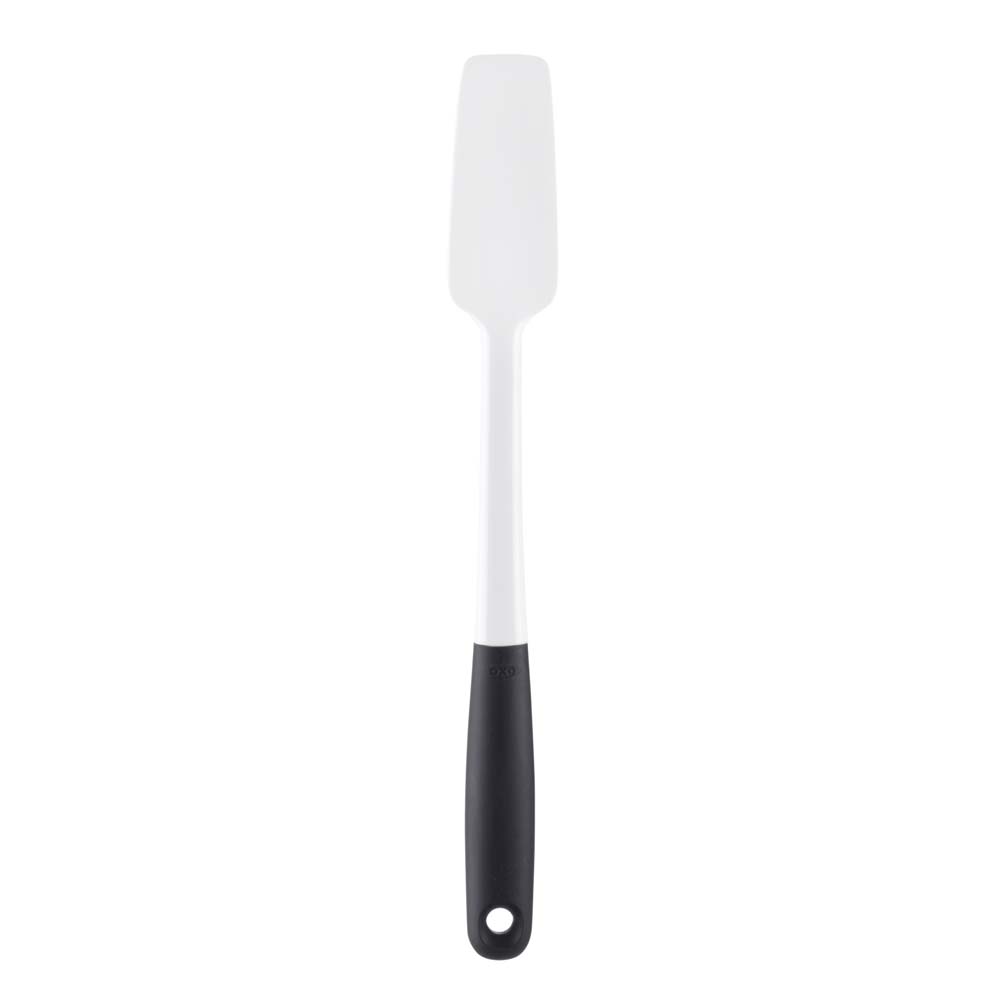
This is at least my second, maybe my third of these. This one is the best design by far. They have all had a great long handle and long, thinner spatula for getting into the nooks and crannies of jars. However, previous iterations have eventually been hacked up by the sharp edges of the jars themselves.   This model is much, much thicker so I am optimistic it might fair better. Price: around $7 and found at pretty much anywhere that sells home goods.

OXO Silicone Basting Brush

basting brush

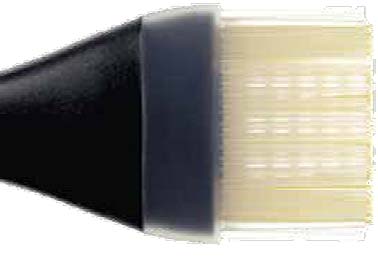
I think these have been around for awhile now, and I’m just late to the party. I had a natural bristle brush with a metal band that was hard to clean, and was constantly imparting “essence de rust.” The new one cleans up nicely in the dishwasher, and OXO’s model in particular has these nifty little holes that soak up and hold your basting liquid. Price: $8-12, and again is pretty widely available.

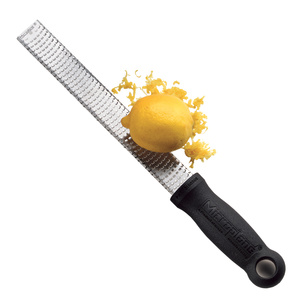
Zyliss All Cheese Grater

zyliss grater

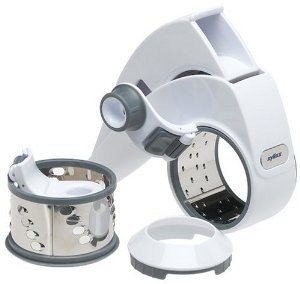
When my box grater died, I was not eager to buy another one. They’re known to grate skin as well as cheese and never seem to stay put on the collection plate. I bought this drum grater which has both a coarse drum for softer cheese like cheddar, and a fine drum for harder cheeses like parmesan. Overall, I am pleased with it and much prefer it to my box grater. However, I did have a piece of the coarse drum break within 6 months. Zyliss replaced for free after I emailed them a picture of the break. The handle could also be a bit longer, because it can be a challenge sometimes to get a grip on it to really get it going good. Still, miles above a box grater, but I could see where it might frustrate some. Price:  $14-22 and is a bit harder to find.  Crate and Barrel and Amazon both have it.


How To Can Your Own Jelly

jelly

This is an update to a post I did a few years ago on my food blog.  I’ve learned a few things now that I’m not a complete canning newbie.  I made another couple dozen jars of jelly over the weekend, sort of on the spur of the moment.

I always mean to plan it better so I can have people over and show them how it’s done.  Of my community of friends I only know of one other person who cans, despite several others expressing the desire to learn.  It really is pretty simple, but it sounds intimidating, which is why I want to show people first hand it is nothing to be afraid of.

Since once again I was not organized enough to have people over, I took more pictures in hopes people would be brave enough to try it on their own.  Here’s proof it’s not too hard.

First off, you will need a little bit of specialized equipment, but not much.  You need jars, lids (you can only use them once), a canner with a rack, and a jar funnel (I already had as part of a Kitchen Aid funnel set).   If you have a bit of cash to spare, you could also get jar tongs and a lid lifter, but I just used my spring loaded tongs and it worked fine.  Plus, I’m not a big fan of unitaskers.

tools for canning

Aside from a canner, all you really need to get started are jars, lids, a canning funnel, and a container of pectin.

For 12, 8 oz Ball jelly jars which came with new lids and even little labels, it was about $8.  The canner with rack was $19.  Check to make sure there is actually a rack in your canner.  I had to look into 4 canners before I found one that still had the rack.  Now who steals canning racks out of pots at Walmart, I have no idea. The canning supplies are usually in the kitchen/home goods section.

Step 1:  Sanitize your jars.  Especially if your jars are new, this is more to get them hot so they don’t shatter when you fill them with boiling jam.  You can do this in the dishwasher, but if yours is like mine, this takes forever.  You also have to time it so your load is finishing as you’re starting to can so the jars are still warm. It’s actually faster to just boil the jars in a large pot, then hold them in there to keep them warm.

I think it's easiest to sanitize in a stockpot.

I think it’s easiest to sanitize in a stockpot.

Step 2:  Fill a small pot of water and heat it until little bubbles start to form, but not a rolling boil.  Turn it off, wait a minute, and then put the lids in.  You have to get them hot, but you can’t boil them or the sealing compound might not work right.  I accidentally let mine boil at one point and they still worked, but I caught it pretty quickly.   Let the lids stay there and keep warm.

I do the lids in my smallest saucepan.  Your stove top can get pretty crowded, so it' nice that at least one burner not be a space hog.

I do the lids in my smallest saucepan. Your stove top can get pretty crowded, so it’s nice that at least one burner not be a space hog.

Step 3:  Fill your canner a little over half way with water and set it to boil with the lid on and the rack not in it.

Step 4:  Now you actually start working on the jelly part.  A word here about pectin.  That’s what makes jelly gel.  Some fruits have enough natural pectin that you don’t have to add any.  I made this rhubarb jam recipe from Allrecipes and because it used orange zest and  juice which are high in pectin, you don’t need anything else.  It tasted great and gelled just fine with a little additional cooking.

However, a lot of fruits you’d want to make jam out of (strawberries, raspberries, blueberries, peaches, sweet cherries, apricots, nectarines) are low in pectin and need it added for your jam to work.  Pectin is normally a ton of sugar.  Jam recipes also call for around 4 cups of sugar.   That’s also why most jelly you buy in the store is super sweet.

One of the reasons I like making my own jam is I can control the level of sugar.  I actually like my jelly to have more of a sweet/tart balance that allows me to taste the fruit, not just sugar.  However, because I put in less sugar, I have to use a special pectin designed for low sugar/no sugar jellies to make sure it sets correctly.  It also doesn’t add a lot of additional sugar like normal pectin.  Ball makes one I like.

I looked at a few recipes before settling on this one.  I’ve used it multiple times with several different kinds of fruit. Don’t try to make more than 10 jars at once as your pectin won’t work right.  To make 8, 8oz jars of jelly, you need the following ingredients:
6 heaping cups of mashed fruit (this is about 8-10 cups pre-mashing)
7 tablespoons Ball low sugar pectin (a little more than the directions say)
2 cups sugar (you can try more or less depending on how tart you like it)
4 tablespoons lemon juice (optional, but helps the flavor.  I tried some with and without, and I like it with
the juice)
1 tablespoon cinnamon (good with stone fruits, but wouldn’t necessarily add to berries)

My strawberries pre-mashing.  I had over 8 cups in there.

My strawberries pre-mashing. I had over 8 cups in there.

First you clean and cut up whatever fruit you are using and mash it in a batter bowl with a potato masher.  You don’t have to completely pulverize it, as some chunks are good, and it will get runnier after you cook it.

strawberries postmash

My strawberries post-mashing. My 8 plus cups went down to less than 6, so I had to add more.

Once you have your six cups, pour it into a medium sized stockpot, preferably a nonstick one.  Even then, jelly is so sticky, it took me awhile to get my pot clean.  Next, mix your pectin and 1/4 cup of the sugar together in a small bowl then add it to the fruit.

Adding in the pectin/1/4 cup sugar mixture before cooking.

Adding in the pectin and 1/4 cup sugar mixture before cooking.

Place this on the burner and bring to a boil, but keep stirring it.  I got distracted once cutting up fruit for my next batch, and it burned up enough of my strawberries that I only got 6 jars instead of 8.  Once it reaches a boil, add the rest of your sugar and bring to a boil again and let it boil hard for one minute.

Watch out during the hard boil.  There's a reason my spoon is so long here.  I'm trying to keep my distance from that very hot liquid that keep trying to jump up and burn me.

Watch out during the hard boil. There’s a reason my spoon is so long here. I’m trying to keep my distance from that very hot liquid that kept trying to jump up and burn me.

At this point, you need to test to see if it is jelling how you like.  Stick a teaspoon in the jelly, scooping up just a little bit.  Blow on it until it cools.  My firmed up nicely, and I tasted to see if the sweetener was right, too.  If it’s not sweet enough or needs more pectin, add a bit more now.  If all is good, move on to the next step.

If it's gelling good, when you run a finger through the goop on the spoon it will leave a trail.

If it’s gelling good, when you run a finger through the goop on the spoon it will leave a trail.

Step 5:  Pour into jars.  Turn the heat off on your stockpot.  Get a few jars out of your pot/dishwasher, and set them near the stockpot.

getting jars out

Carefully pour any water out of the jar as you remove it with the tongs.

Put your jar funnel in the first jar, and ladle the hot jelly into it up to within 1/4 inch of the top of the jar.  This is basically where my funnel stops, so I just filled it to the funnel.  If you notice any air bubbles, you can pop them with a little spatula by running it around the sides.  You also can skim off any foam that might have formed for a prettier jar of jelly, but it doesn’t taste bad.

ladling jelly

Just pour to where your funnel ends. You don’t want to overfill the jars or they won’t seal right.

Then using your tongs or lid lifter, pick up one lid from the hot water.

grabbing lids

Place it on the jar and then screw on the lid so it’s on, but don’t go crazy tight with it.  If you have a little bit of jelly left, but not enough to fill a jar, just put it in a tupperware in the fridge and it will stay good for about 3 weeks.

Jars with the lids on, but the rings aren't screwed on yet.

Jars with the lids on, but the rings aren’t screwed on yet.

Step 6:  Once you’ve got all your lids on, place your jars in the canning rack and lower it into the boiling water of the canner.

The jars will probably wobble around and maybe even fall over, but it's not a big deal.

The jars will probably wobble around and maybe even fall over, but it’s not a big deal.

Make sure the water covers your jars by about 2 inches.  Boil it for 5 minutes, then take the jars out by lifting up the rack.  You’ll start to hear little pop, pops as the jars start to seal themselves.

Make sure you use potholders to raise and lower the rack in the canner so you don't burn your hands.  Also, for handling the jars right after.  They're hot!

Make sure you use potholders to raise and lower the rack in the canner so you don’t burn your hands. Also, for handling the jars right after. They’re hot!

Wipe any excess water off, and let them cool on a towel, so they don’t cool so fast that they crack.  Sometimes you can get the jars to seal without this last step, but you’re more likely to get a few duds (lids that pop up and down when you press a finger on them) that didn’t seal and you have to eat right away.  Also, the processing helps reduce spoilage and gives longer shelf life.  It’s one of the easiest steps, so I’m not sure why some people skip it.

Let them set for about a day, and recheck the lids to make sure they sealed properly.  Then label and store your jam.  Labeling on the side of the jar is nice for giving it away as a gift.  However, those labels are difficult to get off.  For your own use and reuse of the jars, it’s easier to just label the lids with a Sharpie since you only use the lids once anyway.

I was pleasantly surprised how easy it was.  It does have several steps, but once you get it all set up, you can make back to back batches.  I made 24 jars of jelly in about 3 hours, and that was my first time.

A lot of people are real purists and only use fruit from the farmer’s market or that they picked themselves.  For my first batch I used California strawberries from Costco.  You can call me a fruit heretic, but they tasted better than the ones I got at the Durham Farmers Market, and were a heck of a lot cheaper.

The second batch I used apricots I got at Costco again.  Once I mashed them all up, I didn’t quite have 6 cups, so I added some cut up mango I had leftover from I trifle I made the day before, and some cinnamon.  It was very tasty.

The last batch I really threw in everything but the kitchen sink.  I had about 2 cups of strawberries left, then I threw in a pint of blueberries I had in the freezer, and the last third of a bag of frozen triple berry blend (raspberries, blueberries, and marionberries) from Costco.  I defrosted all the frozen fruit before I mashed it up.  I still didn’t have quite enough fruit, so I defrosted a package of blackberry pulp I get at my Latino grocery store and use to make blackberry iced tea.  After I threw that in, I was still short about a cup, so I picked all the strawberries out of another bag of frozen mixed fruit that I bought a while back to make smoothies.  All this together made a 5 berry jelly that actually tasted the best of the bunch!

I have to say, I felt very proud of myself looking at all my gleaming jars of jelly cooling on my dryer.  Try it for yourself!


What Do I Feed My Gluten Free Guest?

At two different points in my life doctors suspected I might have celiac disease, the auto-immune disease that means you can’t eat bread. It turns out I had Crohn’s, a different auto-immune disease. Crohn’s is also not a laughing matter, but basically all I wanted clarified at first was, “Yeah, but I can eat bread with this one, right? I can eat bread, RIGHT?!”  Such is my love for bread.

Because of this, I have the deepest sympathy for those who do have celiac or are gluten intolerant. However, as a hostess, I know the challenge of having a group of people over for dinner and then finding out one of them is gluten free. I don’t want to end up making two different meals and bringing attention to the gluten free guest, who probably gets really tired of feeling like food defines him/her.

Lately, I’ve been trying to find start-to-finish menus that everyone can eat, but won’t have the gluten-eaters wrinkling up their noses. I understand that, too. I’ve eaten a lot of gluten free baked goods that only politeness kept me from spitting right back out.

Making a meal that all the guests can eat serves two purposes. First, you don’t have to cook twice. Also, it means there’s less risk some stray gluten will make its way to your GF guest’s food and make them sick through cross contamination.

So do I have to buy a bunch of specialty stuff that will just rot in my pantry after that?

Nope. Instead of trying to make spaghetti and meatballs with garlic bread gluten free, subbing in all kinds of flours and pastas you don’t necessarily know anything about, just focus on serving naturally gluten free foods.

Most people have mild panic just trying to figure out what to feed their family on a weekly basis without restrictions. Admittedly, when I first started trying to cook for gluten free folks, my brain would freeze up and all I could think of was bread-laden dishes. To help you with the brain freeze, here’s some suggestions.

Main Dishes

Grilled and roasted meat is easy and gluten free, like this pork roast.

Grilled and roasted meat is easy and gluten free, like this pork roast.

Anything that’s mainly just meat will work. Think like a good Midwesterner here. Grilled steak, chicken, pork chops, ribs, shrimp on the barbie, etc. are all fine. Just make sure if you’re using a store-bought marinade that the manufacture didn’t sneak some gluten in. A good roast (beef, pork, or whole chicken) also will work. Pork tenderloin can be made up in countless delicious ways. I have a pan seared salmon recipe with a tomato relish that’s fantastic with no gluten anywhere. In fact, most of my seafood recipes don’t have any bread aside from my crab cakes. Unless your chili recipe has some odd stuff in it, it’s probably gluten free, too.

Double check your sauces, but a lot of Asian food is gluten free.  Try this Beef & Broccoli.

Double check your sauces, but a lot of Asian food is gluten free. Try this Beef & Broccoli.

Also think international food. Most other cultures aren’t quite as bread obsessed as ours. Make a stir fry or curry and serve it over rice. You can make most any Mexican food (tacos, quesadillas, enchiladas); just make sure you use corn tortillas or hard corn shells instead of flour tortillas. Read your labels, though. For some reason, manufactures will sometimes slip regular flour into corn based products. Not all tortilla chips are gluten free.

Sides

In addition to starches and veggies, don't forget our friends legumes.  Try this Indian spiced lentil dish.

In addition to starches and veggies, don’t forget our friends legumes. Try this Indian spiced lentil dish.

I often revert back to my Midwestern roots again here. Most of my dinners growing up involved a good hunk of meat, a starch, and a green veggie of some sort. If you’ve gone the grilled or roasted meat route for your main dish, this isn’t a bad example to follow. For a starch, here are some basics open to you: baked potato, baked sweet potato, some sort of oven fries (check the package if you’re buying a bag from the freezer section, though), a rice dish, quinoa, potato salad, chips, and mashed potatoes (again, if you’re doing instant or buying a gravy look at your labels, though). Don’t serve couscous, though. Couscous is wheat.

If you're ever worried a salad topping or dressing isn't GF, just serve it on the side.

If you’re ever worried a salad topping or dressing isn’t GF, just serve it on the side.

All vegetables start out gluten free, it’s just turning them into casseroles or adding cheesy breadcrumbs or something when you have a problem. It also makes them pretty unhealthy. Keep your veggie prep simple and read the labels of anything you add to them, and you should be fine. Be mindful of salad dressings, which often are hiding gluten. Also, if you are planning on serving a salad with croutons, chow mein noodles, etc. keep them in a bowl on the side so they don’t contaminate the whole salad.

Dessert

This is where things can get heated. You bring out a gluten free dessert and the gluten eaters will start giving you the stink eye. Previously, I’ve made a “real” dessert, and then tried to have a little something for my gluten free person, but I’ll be honest, the GF offering was sad. You can give your GF guest the nicest bowl of fruit ever, but if everyone else is eating triple chocolate brownies, that’s just mean.

The easiest thing, again, is to opt for the naturally gluten free option. Most ice cream, sorbet, and gelato flavors are gluten free. Occasionally if the ice cream has chunks of pie crust or cookies or something it’s not gluten free, but most of them are. I dare a group of gluten eaters to give you the stink eye when you offer them the fixin’s to make ice cream sundaes for dessert.

There are some good GF baked goods out there.  If I don't think they taste good enough, I won't ever post them.

There are some good GF baked goods out there. If I don’t think they taste good enough, I won’t ever post them.

If you really want to offer a baked good, I’ve done a little bit of experimenting with some GF recipes, and I can guarantee you that these two cookie recipes are good. I’ve had both more than once because I liked them well enough that I made them just because I wanted some, not because I had a GF person to feed. Best of all, neither of them require buying any specialty flours.

Suggested Menus

All links are to my recipe blog.

Casual Cookout: Grilled chicken & Johnsonville brats (GF), potato salad, caprese salad, watermelon, corn on the cob, ice cream sundaes

Easy Weekday Dinner: Hard shell taco bar with ground beef seasoned with McCormick’s taco seasoning (GF), shredded cheddar, tomatoes, lettuce, sour cream, salsa, refried beans (most brands are GF) & guacamole. Peanut butter cookies for dessert.

Nice Dinner Party I: Roasted Pork with Plum Sauce, Creamy Mashed Potatoes, Green Bean & Arugula Salad, Chocolate Brownie Cookies

Nice Dinner Party II: Honey Glazed Salmon with Spicy Tomato Relish, baked sweet potatoes with butter, cinnamon & brown sugar, California Citrus Salad, Chocolate Brownie Cookies

Feedback

Still have questions? Put them in the comments section, or use my contact me form. Have another hard to feed guest? Ask, and I’ll see if I can help.

Gluten-free readers, do you have anything to add?

The Best of 2013: My 10 Favorite New Foods

In December, we’re all bombarded with “best of” lists, usually about movies, TV, or interesting people. Anyone can offer you that, but where else can you find a best of food list?

Okay, so Bon Appetit did one. However, I think BA has officially lost touch. They’ve never been a casual cook’s food magazine, but the items that were awarded the 2013 seal of approval this year included items like Dalmatia fig spread, $26/pound sopressata, and not one but two Asian chile pastes (one Korean, the other Japanese). Sorry, but none of that made my list.

While I don't doubt Haechandle's gochujang hot pepper paste is good, I don't know that it would ever make a list of my favorite foods of the year.

While I don’t doubt Haechandle’s gochujang hot pepper paste is good, I don’t know that it would ever make a list of my favorite foods of the year.

To make my list, the product didn’t have to be new to the world in 2013, just new to me. Also, it had to be available either at a national retailer or online. Sadly, that meant that awesome sour cherry jam I can only find at the local Polish grocery and the life-changing falafel mix from Tabia Market weren’t eligible. If you’re a Durham local, I’d be happy to extol their virtues to you, though, if you want details. Also, if I was pretty sure I’m the only person in the world that would get excited about the product, I left it off. Okay, so maybe my South African friend might be excited about my Sharwood’s mango chutney discovery, but I’m pretty sure it doesn’t extend beyond the two of us.

Beverages

joe van gogh red river

Joe Van Gogh’s Red River Blend. In the summer, I drink gallons of iced coffee. Even after it cools off, I find myself still making it because I like it so much. That has a lot to do with finding the perfect coffee beans. I have found Joe Van Gogh’s Red River Blend makes the best iced coffee I’ve tasted. For Durham locals, buy it at King’s Red & White at the corner of Roxboro and Club, because it’s only $8.99 a bag there. For everyone else, you can get it at your nearest Joe Van Gogh or at their online store.

Rishi Masala Chai

Rishi Teas. Before I found Rishi, I mostly drank Harney & Sons. I think Rishi’s are even better. If you don’t like tea, or only a casual drinker, it’s not worth it to pursue Rishi’s teas, as they aren’t widely available. If you’re serious about your tea, though, you definitely need to try them. They make the best chai tea I’ve ever tasted and their cinnamon plum is also delicious. Whole Foods carries a few of their teas in small quantities, and if you’re in Durham, you can sample by the cup at Blend café in Golden Belt. I also know that Greyhouse Coffee & Supply in West Lafayette, Indiana, carries the line for those that don’t want to buy by the box or pound. Rishi makes a few of their teas in bags, but the great majority of them are sold loose leaf, including that great Masala chai. You can buy from Rishi direct, or from Amazon, which is what I do.

coke zero vanilla

Coke Zero Vanilla. How much do I like this diet soda? Enough that I drive to the next county to buy it. Coke tried a Diet Coke Vanilla before and it wasn’t that great. Coke Zero Vanilla, however, nailed the formula. Sadly, no grocery store in Durham County stocks it, and we’ve looked. A few Harris Teeters in Wake County have it, though, and we’ve marked them in our GPS. I’m not the only one who’s this devoted to the beverage, either. Another friend makes the same trek to Wake County, and I have yet a another friend who had been stocking up when she visited her family in Virginia before I let her know she could get it in Wake County. Thankfully, it seems to be easier to find everywhere else in the country.

salted caramel mocha creamer

International Delight Salted Caramel Mocha Creamer. Do you love Starbucks Salted Caramel Mocha but don’t want to pay $4 each time you want one? This creamer doesn’t exactly turn your morning cup of coffee into a Starbucks mocha, but it does taste pretty amazing. Sadly, it’s a seasonal flavor, so stock up before it’s gone. Look for it at any grocery store with the International Delight creamers.

Bread

alpine valley bread

Alpine Valley Multigrain Bread with Omega 3. Yes, it sounds like it tastes like cardboard, but I swear it’s fantastic. I’ve had a tug of war with myself for years about bread. I read the labels and buy the one with more fiber and less sugar, and then wish I hadn’t when I eat it. For a couple of years I made all of my own bread, so I could eat bread that was good for me but also tasted decent. Eventually, I got lazy and went back to buying a series of multigrain breads I couldn’t really get excited about. This bread appeared at my Costco, and I decided to give it a try. It tastes very close to the bread I made at home. It’s a dense sunflower bread with wonderful flavor. It also freezes well. Alpine Valley is carried at Whole Foods in addition to Costco.

tomato basil grilled cheese

Panera’s Tomato Basil Bread. Most of the world probably already knew this bread tasted great because they’ve eaten a Bacon Turkey Bravo, one of Panera’s most popular sandwiches, which is made on the Tomato Basil bread. I don’t like gouda cheese, so I’ve avoided the BTB. However, our housemate started bringing home the bread this year, and I noticed it tasted a bit like tomato soup. Since I always make a grilled cheese to dip in my tomato soup, I immediately thought the bread would make excellent grilled cheese, and I was correct. Now I buy the loaves routinely with a block of my favorite sharp cheddar. It’s a match made in heaven.

Snack Foods 

late july sublime

Late July Sublime Multigrain Tortilla Chips. I have been a fan of the Tostitos with a Hint of Lime Chips for a while. I love lime in my tortilla chips, but my biggest complaint with the Tostitos is they’re a whimpy chip. Try to dip them in a hefty guacamole, and you come back with half a chip and no guacamole. Then you have to discreetly fish your broken off chip out of the dip bowl. A few years back I switched to Food Should Taste Good Multigrain Tortilla Chips because they were healthier, tasted good, and were excellent scoopers. The good folks of Late July have brought both worlds together. They have created a good tasting, healthier, and gluten free tortilla chip with a delectable lime zing that also scoops guacamole likes it’s no big thing. Late July is carried by Costco, Whole Foods, Earthfare, and Lowes Foods.

terra sweets and apples

Terra Sweets & Apples Hint of Cinnamon. These chips are more sweet than salty, but they’re addictive. The cinnamon and dried apples added to sweet potato chips was a stroke of genius. I’m not sure if they’re really good for me, but I’m going to continue to lie to myself and say they are. We buy them in the giant bag at Costco, but Terra’s carried about everywhere these days, even Walmart.

Meat

Columbus-Nitrite-Free-Sliced-Herb-Turkey-Costco-1

Columbus Sliced Herb Turkey Breast. This is not lunchmeat. I’ve eaten pounds and pounds of lunchmeat, and it tastes nothing like most of the sliced turkey I’ve bought from the deli over the years. I like turkey lunchmeat just fine, but this is something else altogether. It tastes like real turkey, the way turkey should taste at Thanksgiving if your host actually cooked it properly. It’s moist and seasoned with herbs perfectly, and as much as I plan on putting it between two slices of bread, half the time it goes straight from the package into my mouth. I found it prepackaged at Costco, but you can also find it at some delis and have it sliced in whatever quantity you want. If you don’t have a Costco nearby, try a Super Target. They carry some of the Columbus line.

Dessert

ciao bella blackberry cabernet sorbet

Ciao Bella Blackberry Cabernet Sorbet. Sorbet is generally pretty good, regardless of brand. It’s just fruit puree and sugar frozen. Most brands aren’t particularly creative in their flavors, either—raspberry, lemon, etc. Ciao Bella has a winner here, though. It’s smooth and sweet as you’d expect a good sorbet to be, but it also has a wonderful richness and depth to the flavor that was unexpected. Ciao Bella is at Harris Teeter, Kroger, and I think Super Target as well.

SeaSaltCaramelGelatoPopHiRes

Talenti Gelato Bars. I’ve been a fan of Talenti’s gelato for awhile now, but they outdid themselves when they debuted their bars this year. My personal favorite is the Sea Salt Caramel dipped in Dark Chocolate. Harris Teeter carries that flavor as well as Double Dark Chocolate and the Coconut. Super Target also has a Mint Chocolate and a Banana Swirl dipped in chocolate. I haven’t found one I haven’t liked yet. They make a raspberry and a coffee, too. Coffee! Why does no one carry the coffee gelato bar dipped in chocolate? That seems like a no brainer to me.

Hmm, I just realized that was eleven things. Well, you got a freebie. Don’t say I never gave you anything.

What did you eat that you loved this year? I’m serious. I want to know. Same rules, though. If I can’t get it, don’t tell me about it. That’s just mean.

A Cheap and Easy Gift for That Hard to Buy for Person

We all have at least one.  Sometimes it’s the grandparent that truly doesn’t need anything, but you still want to give them a little something.  Or maybe you’ve been roped into an office gift exchange with a coworker you barely know. You’re seriously thinking about buying her a candle, even though you know she’s probably got 32 unburned candles from previous gift exchanges.  Is there a friend far away that you’d like to know you’re thinking of them?

The answer is crack.

I should probably explain.  It’s innocuous name is white chocolate Chex mix, but that takes a long time to say.  Several years back, a friend started calling it crack, and it stuck.  It is white and addictive.

crack in a bowl

My great aunt used to bring a giant tin of this over to my family at Christmas, and we loved her for it.  She has since passed, and for several Christmases, there was no crack.  Feeling nostalgic, I found a similar recipe, and tinkered with it so it would match hers.  I gave a few bags to some of the men in the family, and now I get calls every year wanting to know if I’m going to give it, because if I don’t, others will step into the breach.  I usually end up making at least two batches, if not three, for various holiday functions where there are sad faces if it doesn’t appear.

So, if you’d like to make someone’s holiday, make this, put it in a nice Christmas tin from Michael’s or A.C. Moore, and you’re set.  If you can measure and stir, you can make crack.  It keeps well for a couple of weeks in an airtight tin if you have to mail it or make it ahead of time.  If you’re mailing it, layer in some wax paper for padding so you don’t have crack crumbs by the time it arrives.

crack ingredients

Ingredients

  • 3 cups rice Chex
  • 3 cups Kix
  • 3 cups plain Cheerios
  • 2 cups roasted salted peanuts
  • 2 cups pretzels (whatever of the myriad shapes you prefer)
  • 2 cups M&Ms
  • 24 oz. (1 pkg.) Vanilla Almond Bark

Directions

1.Lay down 2 large sheets of wax paper side by side.  You’re going to pour the finished crack on this.

2. Use the biggest bowl in your kitchen, and measure the cereals, peanuts, pretzels, and M&Ms into it.  Mix it up well with a large spoon.

3.  Using a microwave safe bowl, melt the almond bark according to directions.  This usually involves nuking it for about 90 seconds, stirring, and then heating in 30 second increments after that until melted.  Almond bark is made to melt, so this shouldn’t be a problem.  Just don’t don’t it in any trays they provide.  I tried that once, and it was disastrous.

4.  Pour melted almond bark over your bowl of Chex mix.  Working gently but quickly with a spatula, fold the almond bark into the mix and coat it as thoroughly as possible.  As it cools, it starts to set, making it harder to spread.

5.  Once you’ve got the almond bark mixed in good with your Chex mix, then dump the whole bowl onto the wax paper in a big mound.  Let cool.  Once it has set, you can put it into tins.  It will naturally break into chunks, but if you’d like them to be smaller, you can break them down some more.

crack on wax paper

Cheating for Thanksgiving: Bread & Appetizers

Turkey Day is drawing ever closer, and we continue our series on how to make hosting a Thanksgiving Dinner as painless as possible. So far we’ve covered dessert, the sides, and the bird and dressing.

Bread

Of course these look homey and delicious.  If you can keep an eye on them, go for it.

Of course these look homey and delicious. If you can keep an eye on them, go for it.

The people at Pillsbury would have you believe that the only bread choice at Thanksgiving is the canned crescent roll. I’m not even going to disagree that those little guys are tasty. However, if you go this route, here are a couple of things to note. First of all, if you get cramped for oven space, these bake just fine in a toaster oven. Secondly, please don’t bake them on a dark colored cookie sheet or you will burn the bottoms before the rest of it gets done.

Just so long as you don't get distracted and they become carbon.

Just so long as you don’t get distracted and they become carbon.

Raise your hand if you’ve ever eaten a burnt bottomed Pillsbury baked good. Yeah, it’s pretty terrible, isn’t it? It happens fast and you can’t really recover from it. Thanksgiving is a day when you’re probably a little distracted with all the dishes you’re cooking and guests that won’t get out from underfoot. Maybe this is not the day to cook to touchy baked goods.

My family for years has ordered butterhorn rolls from whatever bakery or nice old lady in the area is currently making them. If you have a favorite roll or bakery, I highly recommend this route. While you’re out running all your last minute errands on Wednesday, you can pick these up. Or, bread freezes just fine if you want to knock this task out earlier.

Sister Schubert's yeast dinner rolls

Lacking a favorite, I’d suggest Sister Schubert’s rolls. The line has a number of different options. Yeast, wheat, Parker House, biscuits, etc. I’ve had nearly all of the kinds offered from my local supermarket’s freezer section, and they’ve all been very good. I’ve also found they’re much more forgiving if you forget and leave them in the oven a minute or two too long. It takes a lot longer to burn the bottoms. Serve with real butter and a good preserve, and you’re golden.

Appetizers

Like all dinner parties, you’ll get guests that arrive fifteen minutes early and some that are a half an hour late. Plus, there’s always last minute things to attend to in the kitchen like carving the turkey and popping those rolls in the oven. Perhaps you don’t mind guests loitering in your kitchen wanting to know when dinner will be served, but it drives me bananas. The best way to keep them at bay is an appetizer table. I would suggest cold appetizers so you both don’t have to worry about keeping them hot or devoting precious oven space to their cooking. Here’s a few of my favorites.

deviled eggs

Deviled eggs: It’s not an official family dinner until these have made an appearance. Lots of people put pickle relish in theirs, but I’m pretty sure that’s among the seven deadly sins. Mine are not pretty, but I guarantee they’ll taste amazing. My recipe is here. Regardless of how you make them, there’s one rule to make sure you follow: use older eggs. The fresher your eggs, the harder they are to peel without looking like a beaver went at them.

This is Midwest high cuisine.  Don't knock it until you've eaten your weight in it.

This is Midwest high cuisine. Don’t knock it until you’ve eaten your weight in it.

Cheese plate or cheeseball: In the Midwest, if you serve a cheeseball and Ritz crackers, you better be ready to step back quickly, or you could get caught in the feeding frenzy. I don’t know how many Thanksgivings in Indiana I attended where basketball players perfected their elbowing technique over a cheeseball. I have made several attempts to get the fine people of North Carolina to understand the beauty of spherical dairy products and failed. However, if I put out some fancy crackers, a horseradish chedder, salami, and maybe a wedge of brie, I have found Carolina basketball elbows to be just as sharp. If you’d like to try the Midwest delicacy, here’s a recipe.

wholly-guacamole

Superbowl standbys: A layered bean dip or a big bowl of guacamole next to a mound of tortilla chips are usually reserved for game day celebrations. My mother-in-law has served bean dip on Thanksgiving for years, and it disappears in November just as quickly as it does in February. If you decide to go this route, make the bean dip (I’ve never really had a store bought one I thought was good), but Wholly Guacamole makes a really good premade one if you want to cut some corners there.

Cheating for Thanksgiving: The Bird & Dressing

Continuing in our series on how to make your life easier if you’re hosting a Thanksgiving dinner, this week we’ll be tackling the bird itself. If you missed the previous two posts, I’ve already given tips on desserts and the most common side dishes.

While the purpose of these posts is to show you how to make Thanksgiving easier on yourself, I would argue that you should spend the time you saved elsewhere on the turkey. The bird is the main attraction, yet often it’s the worst tasting thing at dinner. The biggest complaint I hear is that the turkey is too dry or bland or both. There are things you can do to assure a moist turkey, but the biggest is not to overcook it.

165=Done

I don’t know whose job it was to scare the public about salmonella poisoning, but if it was the USDA, I think it has to be the most successful government program ever. Not only is it extremely rare to find someone who will actually put stuffing in a bird anymore, there is a strong tendency to cook turkeys to the Chernobyl setting on your oven.

smoking turkey

I remember the first Thanksgiving I hosted, I asked a long time cook how long I should roast my turkey, and she said something like 6 hours. I planned the timing of my meal accordingly, and was shocked when my meat thermometer told me that my turkey had reached the required internal temperature of 165 degrees in two hours.   I’ve cooked 20+ pound turkeys and it’s never taken longer than 3 hours to cook it to 165 degrees in the thickest part of the meat. When your thermometer says 165—TAKE IT OUT!

It is cooked. It is safe to consume. Leaving it in longer is only going to make it dry, tough, and tasteless. It will not make the already expired salmonella any more dead.

ThermoWorks kitchen thermometer

The cooking time for a turkey will vary depending on how large it is and how hot your oven runs, so checking that meat thermometer is key. I have a wonderful Thermoworks one that you stick a metal probe on a long thin cord into the thickest part of the turkey thigh. Once the probe is in the turkey, you put it in the oven and shut the door right on that cord. The other side of the cord attaches to a small digital display. You can set an alarm on the thermometer so that it beeps not after an allotted amount of time, but when your turkey reaches the desired temperature. So I just set my display for 165 and walk away. When my alarm dings, I stick the probe a couple other places to make sure the turkey is 165 everywhere, and then I take the bird out. If you’d like to purchase this marvelous thermometer, you can here.

If you can master not overcooking your turkey, then you’ll probably be fine whether you do nothing else fancy to it at all. If you’d like to get a bit more complicated, then here’s my bird ritual. I am not really a big fan of turkey, so I think it needs some help.

Buy Fresh and Avoid Mutant Juices

I buy a fresh Butterball turkey. I don’t buy frozen turkeys because they take days to thaw, and I am not sacrificing that kind of fridge space for that long. Especially since I feel like no matter how careful I am, I manage to somehow get thawing turkey juice oozing somewhere I don’t want in my fridge, and that grosses me out. I don’t know if Butterball is better than other brands, but they are often the only brand I can find that is selling fresh turkeys.

Brining

Next, I brine the sucker. My sister turned me on to brining. It takes a bit more effort, because you have to soak the turkey in the brine in the fridge (always a challenge finding space for this, too), but it does make the turkey a lot more moist and flavorful. If you want a traditional brine, the Pioneer Woman has one here. I’m going to use a more unusual one this year because soy sauce as a marinade is always magic. Look for a brining bag, which is essentially a Ziploc big enough to put a turkey and the brine in together. Some grocery stores have them. I found one at World Market. You can also order them here. It’s still a good idea to put the sealed bag with the bird inside of a pot or pan to help you get it in and out of the fridge with less hassle.

Regency turkey brining bag

Once my bird has had a nice soak, I’ll drain it and pat it dry with paper towels. Then I schemer it up good with butter for a nice crispy brown skin. Some years I stuff fresh herbs like sage, thyme, rosemary, and garlic cloves in the cavity and a bit under the skin. I’ll cut up some lemons and shove them in the cavity, too. Then I pop the turkey in at 350 and wait for my thermometer alarm to ring. A good turkey doesn’t take a lot of hands on time, but it does take preplanning and a number of steps.

Carving

After you take the turkey out, make sure you let it rest for 15-20 minutes so the juices can do their thing. As for carving the turkey, I’ll admit I have never done this myself. I have always handed it off to a willing guest. However, this You Tube video shows you how it’s done.

Dressing: The Sacred Family Dish

I don’t stuff my bird, so this is always made separate in my house. In fact, I put it on my side dish sign up, so I often don’t make it at all. Because of this, I have tasted many different kinds of dressings over the years. This seems to be the one side dish that people get the most violently opinionated about. Every family seems to have one way it must be done, period. If that’s the case in your house, then avoid the fight and make the dressing that has been decreed.

Photo from FoodNetwork.com

Photo from Foodnetwork.com

If you actually have a choice, Emeril’s Spinach and Artichoke Stuffing is easily the best dressing I have ever tasted. My sister made it one Thanksgiving when she was a vegetarian and we didn’t have turkey. She figured as long as we weren’t going to do things the traditional way, we should really get crazy and shake things up. You can use frozen spinach instead of cooking fresh spinach to cut down on the prep time. Every time I make it, people just gush over it.

Cheating For Thanksgiving: The Sides

Last week I started a series to provide some cooking tips to help readers actually enjoy their Thanksgiving.  Remember, we’re aiming for turkey napkins here, not tablescapes.    My husband accused me of making up that word.  I only wish it were made up.  This week we’ll continue to look at the Thanksgiving staples in a way that will look and taste good but not aim for Martha Stewart insanity.  If you missed the post on pies, it’s here.

Delegate

The first way to make your life easier is to start handing out assignments.  This is not being lazy or a bad host.  In fact, it took me a long time to realize that guests feel better if they are allowed to contribute something.  Some guests are stubborn and will inform you they are bringing that one thing they always make that doesn’t go with anything on your menu.  Fine, let them make it—fighting and confrontation is not going to make Thanksgiving less work for you.

Screenshot of a Google Doc Thanksgiving Sign up

If you have a set list of things you want, it’s also not unreasonable to give some guidelines.  My Thanksgiving guests are just nerdy enough that I do a Google Doc online sign up with slots for the basics:  sweet potato dish, pumpkin pie, rolls, etc. so I make sure all my staples are covered and I don’t end up with 5 pans of brownies.

If you’re worried about non-cooks, offer sign up options like a bottle of wine or a cash contribution towards the turkey.  You know your guests, so you know what they’d appreciate or find offensive.  Sharing the load not only makes things easier for you, but it also gives individual cooks their opportunity to bring their killer mashed potatoes and feel helpful.  If you don’t like Google Docs, there’s also meal organizing sites like Perfect Potluck.

Sweet Potatoes

These are my personal favorites.  My grandmother used to buy the yams, peel them, roast them, let them soak in some magical syrup for at least a day, etc.  I still am not sure what all she did to them, but while they tasted amazing, the process was intense.  Yeah, don’t do that.

Bruce's Cut YamsFarmer's Market Organic Sweet Potato Puree

Much like the pumpkin, canned sweet potatoes are your friends.  If you eat yours straight up, like my Grandma did, then it’s worth it to cook the sweet potatoes yourself.  I’ve never been to any other Thanksgiving were the sweet potatoes weren’t made into a casserole or smothered in marshmallows.  If you’re going that route, just buy the canned.  I generally go for the cut up kind in syrup that Bruce’s and Pricilla’s sells, but for a bit more money, you can buy straight organic sweet potato puree.

streuseled sweet potatoes

Once you have the canned sweet potatoes, this Streuseled Sweet Potato recipe is quick to prepare and has been a Thanksgiving stand by for me for years.  I make it year round because we like it so much.  Despite being a Cooking Light recipe, guests always accuse me of feeding them candy.  I’ve had more than one person ask me if it was the dessert.

Mashed Potatoes

I have always been a firm believer that if you have sweet potatoes then mashed potatoes are redundant, so I never serve them. However, I seem to be in the minority here, so I’ll concede to popular opinion.  If you insist on both, or if you family just prefers mashed to sweet, there are a few ways to make it easier.

First, don’t do instant potatoes.  Draw that line in the sand now.  Like the frozen pie, it’s the choice of a fatigued mind and your guests know the difference.  If you don’t want to make them, there are many a fine refrigerated and frozen mashed potato product available.  Just read your labels and make sure they’re using real potatoes.  I’d also advise buying the one you’re considering serving and doing a trial run a couple weeks before as a side with your weekday dinner.  Rumor has it the Simply Potatoes brand is good.

Simply Potatoes Traditional Refrigerated Potatoes

If you decide to make your own potatoes, there are a few corners you can cut.  First, buy red skinned potatoes and don’t peel them.  Your mashed potatoes will be a bit more rustic, but a lot less work.  Secondly, don’t make your own gravy.  Making your own gravy is the worst.  It can be done well and successfully, but it is also the last thing to come together and it’s a tricky technique.  Making perfect, rich, lump free gravy is hard to achieve when Uncle Lester is hovering in the kitchen.  Heinz jarred turkey gravy is tasty and error proof.

Heinz Turkey gravy

Even if you do all that, I always have the trouble of keeping mashed potatoes hot.  They come together at the last minute, and the heat of the potatoes is what melts your butter, etc.  They cool awfully fast, and I don’t have that perfect Crockpot size that all my elderly Midwestern relatives seem to have for the express purpose of keeping mashed potatoes hot at family gatherings.

Creamy Mashed Potatoes

My solution has been to make this Creamy Mashed Potatoes recipe of my Grandmother’s.  The potatoes are great by themselves, but I don’t fuss at my guests if they put gravy on them.  The added half and half and cream cheese also helps them stay moist over longer periods.  She shared it with me, touting its wonders because you can make it a day ahead of time and then just stick it in the oven.  That is indeed wondrous for a mashed potato recipe.  It also has the benefit of coming out of the oven nuclear hot.  I never worry about it going cold before guests can eat it.

Green Bean Casserole

French's Green Bean Casserole

If you like it, just make the classic.  I’ve tried fancy versions, but they taste wrong.  The basic recipe is very straightforward; I don’t really know how you could make it simpler.

Cranberry Sauce

Ocean Spray Whole Berry Cranberry Sauce

This is another instance where I’ve made many a fresh cranberry relish that never gets touched.  You know what does get eaten?  That crazy jellied stuff from the can.  You know why?  It’s basically sugar.  I’m a foodie, and I like the canned stuff, too.  I think people also like a known commodity.  They know what the canned stuff tastes like, but there’s no telling what’s lurking in your fancy homemade relish.

Other Options

At this point we start to get into personal taste.  I see a lot of proposed menus with brussel sprouts on them, yet I know very few people who like brussel sprouts.  I’ve only been to one Thanksgiving with the reviled vegetable, and I’m pretty sure I was the only one that ate them.

Green Giant frozen Niblets in Butter Sauce

Corn in some form is another I’ve seen quite a bit. I’d go one of two ways with that.  Either buy some Green Giant microwavable pouches of niblets in butter sauce (super easy choice), or make the never fail corn casserole that uses a Jiffy cornbread mix.

Jiffy Corn Muffin Mix

May I suggest a lettuce salad?  It’s easy, colorful for your table, and honestly most Thanksgiving menus could do with a few lighter dishes.

Still to come:  Turkey, dressing, appetizers, bread, drinks

Cheating for Thanksgiving: Cooking Tips to Make Your Life Easier. Part 1: Pies

Thanksgiving is just a month away now. The cooking and women’s magazines are already starting to appear at the supermarket checkout, mocking you with their Martha Stewart perfection. This early, you might even still have delusions of grandeur and the ambition to try pheasant under glass. On Thanksgiving Eve, you’ll be tearing out your hair, though, screaming “What does ‘under glass’ even mean? Martha Stewart is Satan! Satan!”

Aim lower.  Turkey napkins, not tablescapes.

So, to avoid the eleventh hour mental breakdown, let’s just decide now to take the easy way out, shall we? That doesn’t mean your Thanksgiving dinner can’t look nice and taste good. It just means you’ll enjoy it instead of hating everyone around you and the horse they rode in on.

For the next month, I’m going to be doing a series of posts on how to make some of the Thanksgiving staples, but making it easier on yourself. Our first order of business is the pies. While everyone generally has a pumpkin pie, the second one is a wild card. In the South, it’s pecan, and I’ve also often seen apple. My family always insisted on blueberry.

There are certain ways you can cheat on pies, and ways you can’t. For the love of all that is holy, do not purchase a frozen grocery store pie. People often get tired after all the turkey and sides, and say, “Oh, I’ll just buy a pie.”  There’s a reason I’m doing this post first: priorities. While you’re still sane and fully rested, think about it. Which do you want to taste good–your dessert, or your creamed corn? Um- hmm, that’s what I thought.

Crust: The crucial decision

No one likes to make it, and I’m here to tell you, you don’t have to. That’s right, don’t make your own crust. Yes, yes, it’s better if you make it yourself, but it’s time consuming and a royal pain in the butt. The key is which premade you go with.

Don’t use any of the frozen ones or any of the crusts that come already in their own tin. Not only do they all taste terrible, it’s also the first give away that you bought a store made crust. People see that cheap aluminum and the perfect uniformity to the crust edges and they’re already sighing with disappointment.

Pillsbury roll out pie crust

Use Pillsbury’s roll out crusts from the refrigerator case. No, do not save 50 cents and buy the store brand of the same product. It doesn’t taste as good. You’re already cheating here; buy the Pillsbury. They’re the closest to homemade I’ve tasted, and the real key here is you put it in your own pie plate and crimp it with your own little fingers. People assume you made it, and honestly, that’s half the battle. I get just as many people raving about my crust when I use the roll out crusts as when I make it from scratch.

Don’t make a fruit pie.

Fruit pies are just more work, especially apple. If Aunt Bertha Jane thinks it just isn’t Thanksgiving without apple pie, then sweetly inform Aunt Bertha Jane, “I couldn’t agree more. I’ll put you down for bringing apple pie.”  If it’s your decision, don’t make one. Don’t cheat and use canned apple pie filling. Apple pies are for when you’re only bringing apple pie, not when you’re also hosting and cooking a bird.

Pumpkin

Libby's canned pumpkin

Roasting a pumpkin isn’t difficult, but remember, were not doing Martha’s Thanksgiving here. This is what the good people at Libby are for. Buy the canned pumpkin. If you really want to blow their minds, don’t even make pumpkin pie. Make pumpkin gooey butter bars. No one will miss the pie. A note about that recipe: don’t add the second stick of butter in the filling and only use 2 cups of powdered sugar instead of a pound. Paula can get a bit excessive. I promise they’ll still be sinful.

May I suggest pecan?

Chocolate Pecan Pie

One of four (yes, 4) chocolate pecan pies I made around Thanksgiving last year with Pillsbury crust. They’re that popular. Doesn’t that crust look deceptively homemade?

If two pies are needed, I highly recommend the pecan pie. It comes together quickly and is a crowd pleaser. Plus, then you have two one-crust pies, using up your Pillsbury crust pack. This Chocolate Pecan Pie recipe is what I use, and every Thanksgiving it goes quicker than the pumpkin. I didn’t do this with the pie pictured, but have found roughly chopping the pecans makes it easier both to slice and eat.

Don’t forget the whip

Land O Lakes Whipped Cream

As a matter of fact, I do buy this in the 3-pack. No, it never goes bad. Whip makes everything better, people.

My family still insists on Cool Whip, and I can’t talk them out of it. Real whip that I beat myself is usually what I prefer, but on Thanksgiving Land O Lakes whipped cream from a can is more than okay.

Tips for Making Great Cookies

Cranberry Macadamia Nut Butter Cookies--some of my favorite cookies to make.

Cranberry Macadamia Nut Butter Cookies–some of my favorite cookies to make.

Of people who enjoy cooking, there are usually two types of people:  bakers and non-bakers.  For a long time I considered myself an overall good cook but a non-baker.  I had friends who could make cakes that rose from their glass stands like sky-scrapers, but mine always seemed to resemble New Mexico architecture—squatty and unattractive.

I’m stubborn, though, so I’ve put a lot of work and trial and error into becoming a better baker.  I wanted to make desserts and breads that both tasted amazing and looked beautiful.  So, a decade and a half into my passion with cooking and baking, I thought I’d start sharing some of my cooking secrets, starting with cookies.

Goal:  The best possible tasting cookie

Solution:  Use the good stuff.  You know how Papa John is always reminding us “Better Ingredients, Better Pizza?”  Yeah, it works the same with cookies.

land-o-lakes-butter1. Use real butter.  Some bakers swear by unsalted, but I like salted sweet cream.

Use the sugar the recipe calls for.

2. Use real sugar of the kind specified.  Use white when it asks for white.  Use light brown when it asks for it, dark brown, muscovado, turbinado, light or dark corn syrup, golden syrup, etc.  Each is different, and the recipe asks for a different sugar for a reason.  If you substitute something else, that’s fine, but don’t expect it to taste the same.

guittard-106-green-mint-chips-395x184

3. When a recipe calls for chocolate chips, buy a high quality.  Nestle or Hershey is not high quality, and certainly not generic.  Ghirardelli makes great, widely available chips that aren’t much more than Nestle. Even Walmart has Ghirardelli.  I prefer their milk or bittersweet (dark) to the semi-sweet.  They also make a good baking cocoa. For butterscotch chips, Nestle is acceptable if you don’t want to special order.  Guittard makes a great mint chip that World Market stocks, as well as several other specialty flavors that can be ordered on Amazon.  The Prepared Pantry make amazing cinnamon mini chips (also Amazon), but only order them in the winter, otherwise they’ll melt into a giant cinnamon blob en route.

Store your nuts in air tight bags in the freezer.

4. Make sure your nuts are fresh.  Nuts go rancid quickly in your pantry, so store them in your freezer.

Keep spices fresh by storing them away from light and heat.

5. Make sure your spices are fresh, too.  Your nose is a better indicator than date here.  Spice Nazis might tell you to give every spice the heave ho after six months, but if you’re keeping them away from heat and light and bought them fresh from a store with good turnover, you can keep them longer than that.

microplane-zester-grater-40020

5. If it says add zest, add it!  Zests are crucial to any recipe that call for them.  I’m amazed at people who leave them out.  Buy yourself a good microplaner, and zesting is a breeze.  Dried zest from a jar is not an acceptable substitute.

mexican vanilla

6. Use a high quality vanilla and more of it.  I prefer the taste of Mexican vanilla, also now easily obtained at even Walmart.  Usually when it calls for one teaspoon, I use two.

Goal:  The best possible looking cookie

Solution:  You have to decide if this is more important to you than taste.  While some of the solutions work simultaneously with the previous list, the most sure fire way to get a pretty cookie is to use Crisco instead of butter.  It’s what makes store bought cookies so pretty, but butter is what makes a homemade cookie taste better than a store bought one.

crisco1. Substitute Crisco butter flavored sticks for the butter in your recipe.  This is it.  This will make the biggest difference in how your cookies look.  They won’t taste quite as good, but they’ll look perfect every time.

rumford_baking_powder

2. If it calls for baking powder, make sure your powder isn’t more than 6 months old. Smell doesn’t matter here.  When you open the can, date it, and be aggressive about throwing it out.  I prefer Rumford brand because it’s aluminum free.   Baking soda is more forgiving.

Goal:  Getting from batter to finished cookie

Solution:  Have the right tools and know thy oven.

cookie scoop

1. You don’t have to have a cookie scoop, but I’m a big fan.  They come in multiple sizes and help you get more uniformity.  It also is just an easier delivery mechanism than a spoon and your finger.

half sheet pans2. A decent cookie sheet goes a long way, too.  If it bends on its own, is rusting, or cost you less than $10, it’s probably a crap cookie sheet.  Airbake does make nice cookie sheets, but I prefer professional half sheet pans because they are useful for tasks other than cookie baking.  Don’t use a non-stick sheet.  They are usually very dark and only result in overdone cookie bottoms.

pam-baking-72445

3. If you used real butter, you probably don’t need any non-stick help, but on the occasions you do, use a baking spray with flour or parchment paper.  I like Pam Baking better than Baker’s Joy, which gets very messy.

oxo-good-grips-good-cookie-spatula

4. OXO’s cookie spatula is hands down one of my favorite kitchen tools and a must have.  It gets under absolutely anything.

in-oven

5. For the actual cooking, cookies can take anywhere from 7 to 14 minutes, depending on the ingredients and your oven.  No one can tell you the exact time your cookies will take.  You have to know your oven.  To learn your oven, make a basic batch of chocolate chip cookies, and take sheets out at 8, 9, 10, & 11 minutes and see what ones you like best once they’ve cooled.  Once you know how much time a cookie takes, write it directly on your recipe until you feel like you know what a cookie should look like when it’s done.  A good general tip for any oven is to rotate your cookie sheets (both front to back and top and bottom rack if doing two sheets at a time) about five minutes into your cooking time.  Every oven has hot spots, and this helps facilitate more even baking.

Got any cookie issues?  I’ll try to help. Leave a comment if I didn’t already address a common problem you have with your cookies.